
Enjoy this creamy, easy to make dairy free chocolate pudding recipe the whole family will love! With a few simple ingredients, you can recreate a childhood treat that will bring back all the nostalgia.

Chocolate Pudding Ingredients:
- 2 Cups of canned goat and coconut milk combined
- 2/3 Cup of sugar
- 3 TBSP of cornstarch
- 1/2 Cup of cocoa powder
- 1/8 Tsp of salt
- 4 Egg Yolks
- 2 TBSP of dairy free butter
- 1 Tsp of vanilla extract
The Secret to Creamy Dairy Free Chocolate Pudding
When converting a pudding recipe to dairy free, I first tried out almond milk you buy in the refrigerated section of the grocery store. Unfortunately, the pudding texture did not turn out the way I had hoped. It lacked the creamy and silky texture that pudding should have. After a few experiments, I discovered that if I used canned coconut milk and canned goat milk, it created a creamy pudding just like if you had used dairy! The canned milks contained more of the cream and less water resulting in a creamier pudding.
To combine the canned goat milk and canned coconut milk for this recipe, I suggest using a blender. While you can whisk them together, it can be a bit difficult to fully incorporate the thick creamy part of the coconut milk. By using the blender, it fully incorporates the cream from the canned coconut milk.
Directions:
- Empty one can of goat milk and one can of coconut milk into a blender. Blend on medium or high until both milks are fully incorporated.
- In a saucepan, whisk together 2/3 cup of sugar, 3 TBSP of cornstarch, 1/2 cup of cocoa powder, and 1/8 tsp of salt.
- If your cornstarch or cocoa powder is clumpy, shift them to avoid clumps in your pudding
- In a separate bowl, separate four egg yolks from the egg whites. Gently scramble the egg yolks and set them aside.
- Measure out 2 cups from your milk mixture and slowly add it to the saucepan while whisking. Add the egg yolks and continue whisking until incorporated.
- Turn on the burner to medium to low heat. Whisk continuously for best results.
- When the mixture begins to thicken and bubble, turn the heat to low and continue whisking. You do not want it to come to a boil. You will feel it start to thicken and your whisk begins to drag along the bottom of the pan before it even starts to bubble. This is when you want to lower the heat.
- Continue whisking until all of the pudding has thickened and then remove it from the heat.
- As it thickens you will see the more liquid parts slowly disappear. Once you no longer feel or see any liquidy parts turn off the heat.
- Place a fine-mesh strainer over a clean bowl and pour the pudding through. You will need to stir it through the strainer. Throw out any lumps the strainer catches.
- Stir in 2 TBSP of dairy free butter and 1 tsp of vanilla extract. Once the butter is completely melted and the pudding has cooled slightly, spoon them into your desired containers. Small mason jars work great for our family!
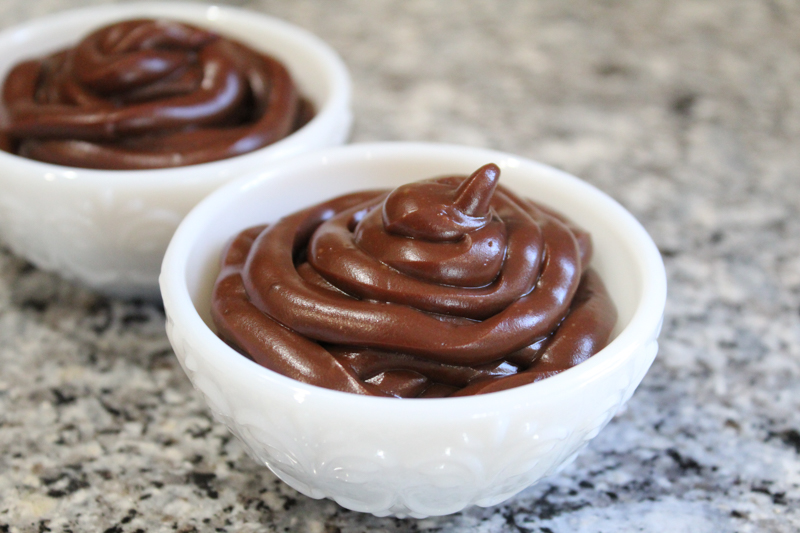
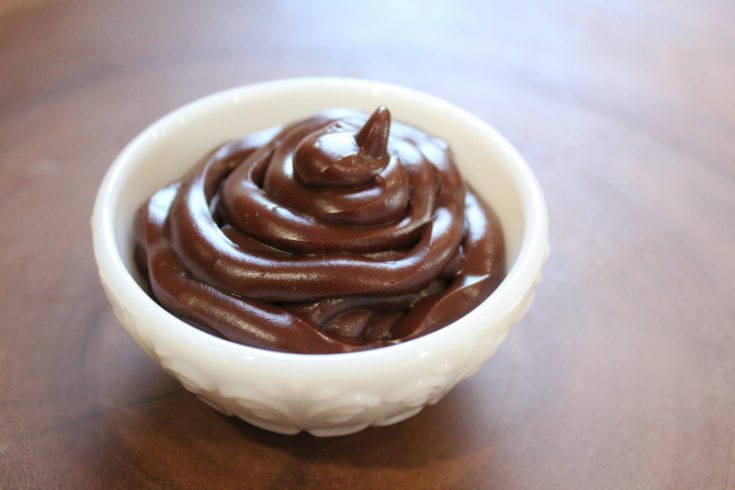
- For a fancy presentation, put your pudding in an icing piping bag with a small opening and pipe it into your containers.
- Chill for 2-3 hours before serving.
Serving Tips
While this dairy free chocolate pudding recipe is easy to make, pudding can be messy to serve. However, if you use an icing piping bag, it is easy to serve and you can make it look as fancy as you would like. After the butter has melted and the chocolate pudding has cooled slightly, spoon it into a piping bag.
Next, choose what type of containers you would like to serve your pudding in. I like to serve mine in either little dip bowls or quarter pint 4oz mason jars. The mason jars are easy to store in the fridge and pack in lunches. It also creates small servings which are perfect for an evening treat.
Once you have your containers ready, cut a small hole in the tip of the piping bag and squeeze the pudding out starting on the outside rim of your container. You can get as creative as you’d like. I typically pipe mine into the jar in a circular motion.


Simple Dairy Free Chocolate Pudding Recipe
Enjoy this creamy, easy to make dairy free chocolate pudding recipe the whole family will love! With a few simple ingredients, you can recreate a childhood treat that will bring back all the nostalgia.
Ingredients
- 2 Cups of canned goat and coconut milk combined
- 2/3 Cup of sugar
- 3 TBSP of cornstarch
- 1/2 Cup of cocoa powder
- 1/8 Tsp of salt
- 4 Egg Yolks
- 2 TBSP of dairy free butter
- 1 Tsp of vanilla extract
Instructions
- Empty one can of goat milk and one can of coconut milk into a blender. Blend on medium or high until both milks are fully incorporated.
- In a saucepan, whisk together 2/3 cup of sugar, 3 TBSP of cornstarch, 1/2 cup of cocoa powder, and 1/8 tsp of salt. (If your cornstarch or cocoa powder is clumpy, shift them to avoid clumps in your pudding)
- In a separate bowl, separate four egg yolks from the egg whites. Gently scramble the egg yolks and set them aside.
- Measure out 2 cups from your milk mixture and slowly add it to the saucepan while whisking. Add the egg yolks and continue whisking until incorporated.
- Turn on the burner to medium to low heat. Whisk continuously for best results.
- When the mixture begins to thicken and bubble, turn the heat to low and continue whisking. You do not want it to come to a boil. You will feel it start to thicken and your whisk begins to drag along the bottom of the pan before it even starts to bubble. This is when you want to lower the heat.
- Continue whisking until all of the pudding has thickened and then remove it from the heat. As it thickens you will see the more liquid parts slowly disappear. Once you no longer feel or see any liquidy parts turn off the heat.
- Place a fine-mesh strainer over a clean bowl and pour the pudding through. You will need to stir it through the strainer. Throw out any lumps the strainer catches.
- Stir in 2 TBSP of dairy free butter and 1 tsp of vanilla extract.
- Once the butter is completely melted and the pudding has cooled slightly, spoon them into your desired containers. For a fancy presentation, put your pudding in an icing piping bag with a small opening and pipe it into your containers.
- Chill for 2-3 hours before serving.

Leave a comment and let me know if you enjoyed this recipe!

Recent Comments