

With a few bones saved from roasts, steaks, or a whole chicken carcass, you can make your own bone broth with a few simple ingredients.
What Do You Need to Make Your Own Bone Broth?
- Bones – a whole chicken carcass is a great way to start because it has all the types of bones you need to make thick, gelatinous bone broth. If you want to know what kinds of beef bones to use, skip down a few sections and I will share the specifics with you.
- Water
- Apple Cider Vinegar
- Bay Leaves
- Peppercorn
- Onions
- Garlic
- Carrots
- Celery
While you technically only need the first two ingredients to make a plain bone broth, I like to include all nine of these ingredients if I have them on hand.

A large stock pot is also very useful when making bone broth, but you can use the largest pot you own, an instant pot, or a slow cooker. Any and all of these vessels will give you a beautiful broth.
The last thing you need is time. Bone broth becomes richer the longer you simmer it. I will often simmer my bone broth for 12-24 hours.
Cooking Schedule
This is a 3-day process for me. It can be done more quickly, but this flow works well for me and is very hands off.
Day 1
In the evening after supper, I load up my large stainless steel stock pot (I believe mine is either a 16 or 18 quart stock pot) with bones, veggies, and a dash of apple cider vinegar, fill about two inches from the top with water and bring it to a boil. Because I use such a large pot, it takes about 20 minutes for it to reach a boil. If you are using a smaller pot, some suggest letting the bones sit in the water with the apple cider vinegar for about 30 minutes to help draw the nutrients out of the bones. Others say it doesn’t make a significant difference. Since mine takes a while to reach the boiling point, I call it good but feel free to do your own research and make your own decision.

For about the first hour or so keep the bone broth at a boil and periodically skim any foam that rises to the top. This removes impurities from the broth and makes the end product nice and clear.
After an hour or two when you are ready to go to bed, reduce the heat to low and place a lid on the bone broth.
Day 2
Allow the broth to simmer until the following evening. I usually pull mine off when I need to start cooking supper. Place the whole pot somewhere safe to cool down.
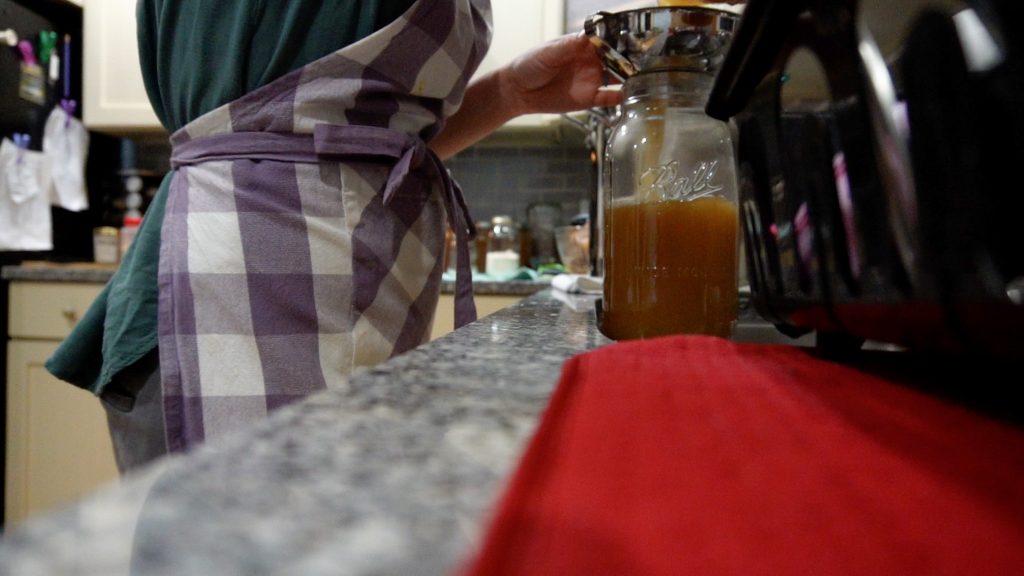
After cleaning up the kitchen in the evening when the pot has cooled, I remove the bones and strain the broth. Afterward, I pour the broth into half-gallon jars or large bowls and store them in the fridge overnight. This step allows the fat to solidify on top of the broth. It is important to scrape off the fat layer before canning the broth to prevent it from going rancid in storage.
Day 3
The following morning, scrape off the solidified fat and reheat the bone broth in a large pot. Prepare your pressure canner and jars. Pressure can the bone broth according to the requirements for your elevation, canner, and jar size. I can my bone broth in quart-sized jars using a dial gauge pressure canner at 11 psi for 25 minutes with a 1-inch headspace. The National Center for Home Food Preservation is a trusted resource for canning times and practices.
After the pressure canner has depressurized, remove the jars and place them on a wooden cutting board or kitchen towel and let them sit for 12-24 hours. Then remove the rings, wipe down the jars, label them, and place them in your pantry.
Pressure Canning VS Freezing Bone Broth
Pressure Canning
Pros:
- long term storage
- shelf stable
- ready to use
Cons:
- additional materials needed (jars, lids, rings..)
- the time it takes to can the broth
Freezing
Pros:
- long term storage
- takes less time
Cons:
- additional materials needed (freezer containers/silicon molds)
- thawing the broth to use it
- valuable freezer space
- possible busted containers if storing in glass
Depending on your resources and time, either of these options are great! I started off by freezing bone broth, but as I became more familiar with pressure canning, I decided it was much more convenient for me to have it shelf-stable and ready to go. While canning bone broth does take more time, if you do a large batch, then you are set for a few months.

Health Benefits of Bone Broth
Bone broth is like the original multivitamin. I’d also say it is the best multivitamin because everything in it is in its natural form that your body can recognize and utilize.
The bones are rich in calcium, magnesium, potassium, phosphorus, and many trace minerals!
The connective tissues in the joint bones add glucosamine and chondroitin to the broth as well. This makes it a great supporter of joint health!
The bone marrow is filled with vitamin A, K2, zinc, iron, boron, manganese, selenium, omega-3, and omega-6 fatty acids! Just think of all the money spent on those vitamins in contrast to all the high-quality bones thrown out of typical households!
When prepared properly, the broth congeals when cold. It congeals because of the gelatin it has taken from the bones. Gelatin helps digestion and it helps protect and repair the gut lining. The amino acid glutamine in gelatin can prevent and heal “Leaky Gut“.
Because of its healing properties for your gut and the way it improves digestion, it also helps reduce inflammation!
Why Should You Make it Yourself?
Well, let me ask you this, have you ever seen store-bought broth congeal in the fridge? No? Me either! The quality of the product is significantly different. As a result, the health benefits differ drastically!
Way to Incorporate Broth into Your Cooking
Now how can you use this amazing broth? I am sure none of us want to eat soup year round every week. Bone broth is actually very easy to incorporate into your normal cooking. Whenever a recipe calls for water you can typically replace that with broth. If a recipe calls for milk to make a sauce, you can oftentimes do half milk and half broth.
Recipes That Use Bone Broth
- Soups
- Rice
- Mashed potatoes
- Gravy
- Cream sauces like alfredo
- Mac and cheese
- Omelets
- Simmer vegetables in broth
- Au Jus sauce
- Cooking dried beans

Printable Recipe Card

Bone Broth
Equipment
- 1 Large Pot
- 1 Pressure Canner
- Canning Jars, Rings, and Lids
Ingredients
- bones
- water enough to cover the bones in the pot
- 2 Tbsp apple cider vinegar
- 1-2 bay leaves
- 1 Tbsp peppercorn
- 2 onions halved peel on if clean
- 1-2 heads of garlic halved
- 2-4 carrots washed and halved
- 2-4 stocks of celery washed and halved
Instructions
- In the evening fill a large stock pot withbones, 2 onions halved, 1-2 heads of garlic halved, 2-4 carrots, 2-4 stocks of celery
- Then fill the pot with enought water to cover the bones.
- Finally, add2 Tbsp apple cider vinegar, 1 Tbsp peppercorn, 1-2 bay leaves
- Place the pot on the stove and bring it to a boil.
- For the first 1-2 hours, check the broth occasionally and scoop off any skin that is on the top.
- After the first two hours, reduce the temperature to low and put a lid on the pot. Allow it to simmer overnight for 12-24 hours.
- Remove the pot from the burner and allow it to cool down.
- Remove the large bones from the pot with tongs and then strain the broth thorugh a fine mesh strainer into a clean glass container with a lid.
- Place a hand towel down in the fridge and place the containers of broth on top of the towel and allow them to cool overnight until the fat has solidified on top.
- When you are ready to can the broth, skim the solidified fat off the top and dump the broth into a clean large pot.
- Bring the pot of broth to a boil.
- Meanwhile, prepare your pressure canner and jar per their instructions.
- Ladle the hot broth in to the warm jars leaving a 1 inch head space.
- Wipe the rims clean and then add the lids and rings. Tighten till they are finger tight.
- Place the jars in the boiling pressure canner and can according to your elevation and jar size. For me, I can quart-sized jars at 11 psi for 25 minutes.
- Allow the canner to depressurize and slowly remove the lid to prevent siphoning.
- Transfer the jars to a towel on the counter and allow them to cool for 12-24 hours. Then, remove the rings, wipe down the jars, label them, and place them in your pantry.

Recent Comments