
I have been making applesauce every fall now since 2019. Homemade applesauce’s taste is superior to what you can find in the grocery store. You can control how thick you like it. Also, you are able to control how much if any sugar your applesauce contains. When I stumbled upon the fact that I could make applesauce with my KitchenAid, I was ecstatic.

Making applesauce with the KitchenAid makes the process so much faster and easier. How? Because you do not have to peel or core the apples!
All you need are a few kitchen essentials, a water bath canner, jars, a KitchenAid stand mixer, and the fruit strainer attachment.
Prep Your Space
Prepare your processing space before you get started. I usually clear off and clean my countertop and stove. Then I disinfect my sink so that I can wash the apples.
Set up your KitchenAid stand mixer with the fruit strainer attachment and two large bowls. One bowl will catch the applesauce and the other will catch the stems, seeds, and residual apple bits.
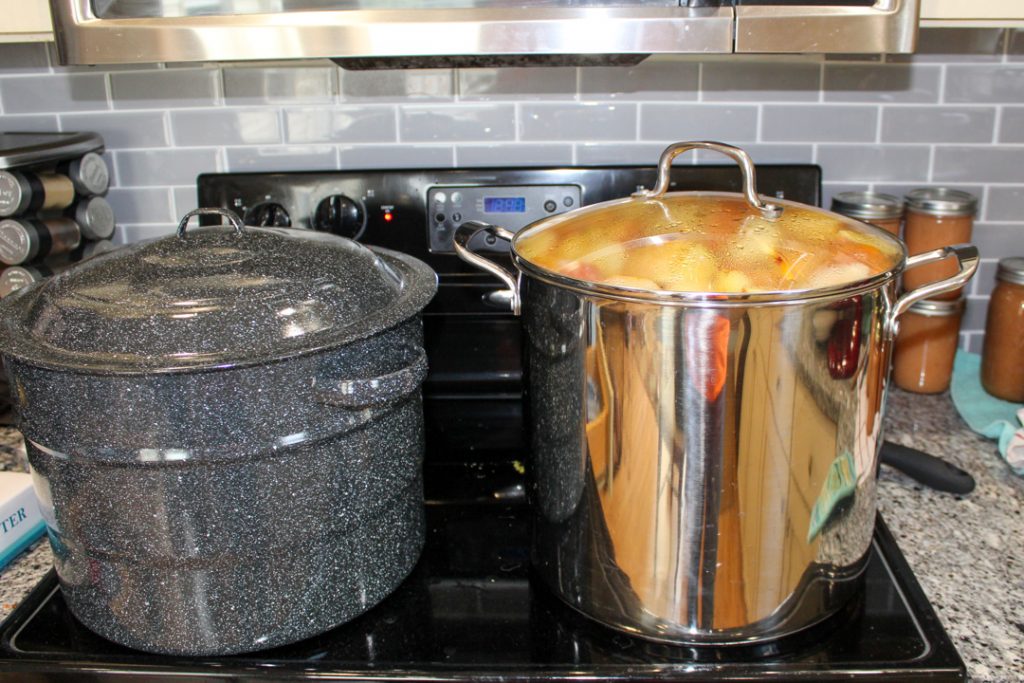
Fill your water bath canner and set it on the stovetop. You need enough water for it to cover an inch above the jars. If you have hard water like myself or just want sparkly clean jars after canning, add a few glugs of white vinegar to the canner. I wait to turn the burner on until I have chopped my apples.
Watch How to Make Applesauce
How to Make Applesauce With a KitchenAid Mixer
Step 1: Clean the Apples
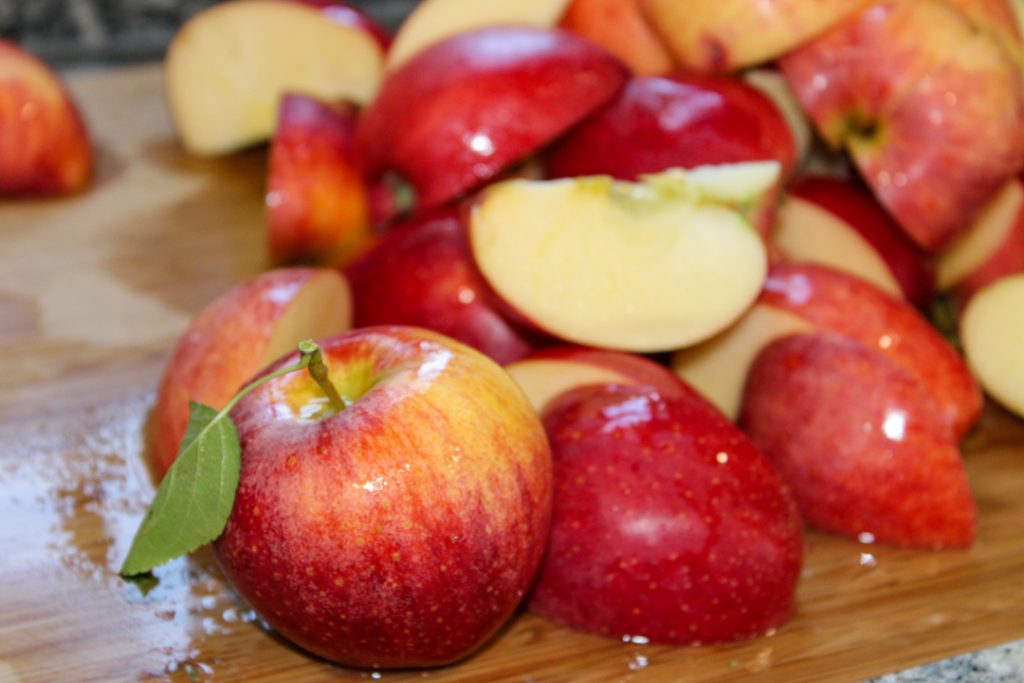
Because you are going to be cooking these apples down, you want to thoroughly clean them. I fill my sink with cold water and add a few glugs of white vinegar and let them soak for a few minutes.

Step 2: Quarter the Apples
Next, take your clean apples from the sink and quarter them. If you are using larger apples like Honeycrisp, you might need to cut them into smaller pieces. You just want the pieces to fit into the fruit strainer attachment easily. You will be cooking them down and they will squish so it’s not a huge thing to worry about though!
Step 3: Cook the Apples
Place your quartered apples into a large pot. I use my stockpot but just use the largest pot you have. Fill your pot with water till the apples are nearly covered so that they all cook evenly. Then put the lid on and turn your burner to high. Cook on high or medium-high until the apples are soft while stirring every so often. The amount of time it will take to cook down will depend on what size and how full your pot is. For my stockpot, it takes about an hour. I also start heating up my water bath canner at this point.

Step 4: Process the Apples with the Kitchenaid Fruit Strainer
Turn your mixer on to 1 or 2. Using a slotted spoon, remove the apples from the pot and push it into the fruit strainer. I use the end of a wooden spoon to push mine down because I don’t have the plunger from the attachment kit.
The applesauce will come down through the strainer and the apple remnants will come out of the end. I like to use my KitchenAid bowl and pouring shield. The shield helps prevent any of the remnants from falling into the applesauce by accident.

Step 5: Season the Applesauce
You can add sugar, cinnamon, or leave the applesauce plain. I like to have some of each preserved in my pantry. For the plain ones, I add a bit of lemon juice and then can it as is. For the cinnamon applesauce, I will add a touch of sugar and cinnamon and then taste test it before canning. There is no right or wrong with these measurements. It is totally up to you and your taste. The only measurement you need to worry about is the lemon juice when it comes to canning.
Step 6: Preserve the Applesauce (Canning or Freezing)
How to Can Homamde Applesauce

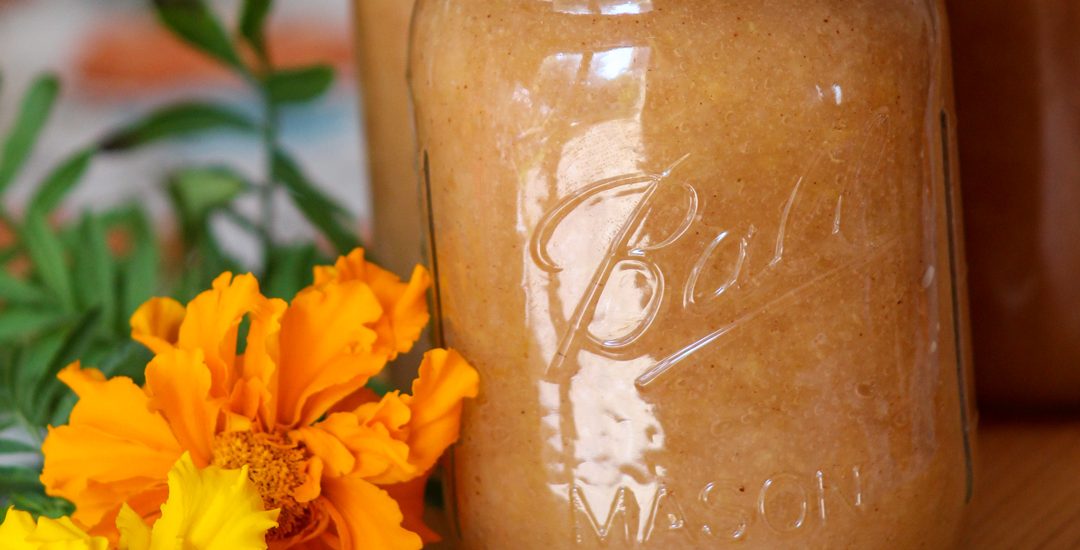
Canning applesauce was my first solo canning experience and it is so easy! After you have your finished applesauce product, all you need to do is add lemon juice before canning it. You need roughly 3 tablespoons of lemon juice for every 10 lbs of apples you processed. My stockpot usually fits a little over a fourth of a bushel of apples which is roughly 12 pounds. Therefore, I usually add around 4 tablespoons of lemon juice to my bowl of applesauce and stir it in thoroughly. You can always reference the Ball Fresh Preserving website for canning recipes/measurements.
Once your applesauce is ready, ladle it into your clean and sterilized/warm jars. Because you are able to process the apples while they are hot, I do not heat up my applesauce on the stovetop before putting it into the jars. If your applesauce has cooled down, then you would want to reheat it on the stovetop to avoid thermal shock and broken jars.
In a small pot, simmer your lids to sterilize them and soften the seals. If you are using new ball jar lids, they do not need to be simmered. Just be sure to wash them before canning.
Wipe the top of the jars clean with a washcloth or paper towel. Then twist your lid on fingertip tight.
Process in the boiling water bath for 20 minutes. After 20 minutes, remove the lid and let them sit for 5 minutes before removing the jars to avoid a rapid temperature change.
Allow the jars to cool on the countertop for 12 hours. Check the seals, label, and wipe down the jars before storing.
How to Freeze Applesauce
Stir in the appropriate amount of lemon juice needed for your batch of applesauce. You can always reference the Ball Fresh Preserving website for canning recipes/measurements, but you need roughly 3 tablespoons of lemon juice per 10lbs of apples.
Allow the applesauce to cool completely. You can store it in the fridge overnight in a bowl or pot before portioning it out for the freezer.
You can freeze the applesauce in:
- freezer bags
- containers
- icecube trays
Freezer bags work great because you can easily remove the air from them to avoid freezer burn. Containers are nice because they are easy to organize. Icecube trays create small portions that are quick and easy to defrost.
If you freeze your applesauce in freezer bags, lay them flat in the freezer for 6 hours, and then organize them for long-term storage. Also, be sure to label your bags! Homemade applesauce in the freezer will keep for around 6 months.
Recipe Card
How to Make Applesauce with Your KitchenAid

Ingredients
- Apples of choice
- Lemon Juice (3 Tbsp/10lbs of apples)
- Cinnamon (optional)
- Sugar (optional)
Instructions
- Soak the apples in cold water with a few glugs of white vinegar for 5 minutes.
- Cut the clean apples into quarters.
- Cook the apples in a large pot filled with water. The water should reach your top layer of apples.
- Simmer the apples on high or medium-high until tender. Time will depend on how large your pot is and how many apples you are cooking down. Stir every 10-15 minutes to make sure they are cooking evenly.
- With the fruit strainer attachment on, and two large bowls set up to catch the applesauce and the apple remnants, turn your mixer to 1 or 2. Use a slotted spoon to transfer the apples from the pot to the fruit strainer and push them down.
- Once you have processed your pot of apples, add any seasonings and/or sugar to the applesauce until it has the taste you prefer.
- Add 3 Tbsp of lemon juice per 10lbs of apples processed to your applesauce and stir it thoroughly. (for a quarter bushel of apples, I add 4 Tbsp of lemon juice)
- To store your applesauce you can freeze it or can it in a water bath canner. If freezing, allow it to cool completely before portioning it out and freezing it. If canning, while the applesauce is still hot, ladle it into your prepared warm/sterilized jars, wipe the tops clean, tighten the lids fingertip tight, and process for 20 minutes in the water bath. Allow the jars to cool for 12 hours before storing.
Cons to Making Applesauce with the KitchenAid Mixer
If you love chunky applesauce, then you will not want to use the fruit strainer with the KitchenAid mixer. The KitchenAid produces a fine applesauce because it’s pushed through a strainer with small holes that prevent the seeds, stems, and skins from coming through. If you like to make chunky applesauce, then you might want to consider purchasing an apple peeler & corer.

What to Do With the Leftover Apple Water?
If you love apple cider, then save the water that’s left after you cook down your apples! Strain it, add some cinnamon sticks, a little clove, allspice, nutmeg, brown sugar, and half an orange and then simmer it uncovered for an hour. Delicious! I will be publishing a full recipe soon.


Recent Comments